Three Methods of Adding Images Your Posts
A School News page is a great way to communicate important information with your school community. It’s the first thing students and parents see when they log in and it can even be posted on your school’s website. And teachers keep their classes informed with Teacher Pages, personalized web pages for announcements, course pages, and more.
Both give you the ability to include photos, illustrations, graphics, animated GIFs, files, and videos. Images should be saved as .jpg, .gif, .png, or .svg. File size should be no more than 3 MB.
Method 1: Upload An Image From Your Computer
1. Click on the Image/File Upload button.

2. Click on the Choose File button and select the image or file you want.

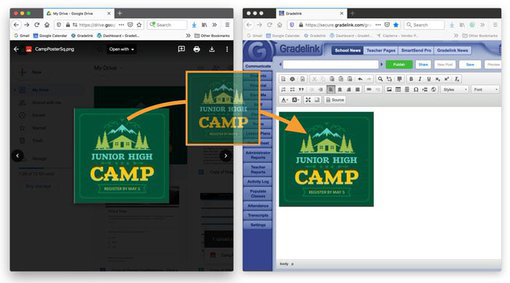
Method 2: Drag and Drop An Image From The Web
1. Find an image online you want to use in your post.
2. Open a second browser window, log in to Gradelink, and open School News or Teach Pages.
3. Click and drag the image from the first browser window into your post in the second window.

Method 3: Copy and Paste the Image’s URL Into Gradelink
1. Upload your image to an image hosting website like Waldo Photos, Dropbox, or Google Photos. If you have a school website built by Gradelink, you can also use your website’s media library.
2. Once the image is uploaded, right-click on it.
3. Select “Copy Image Address” or “Copy Image Location,” depending on the browser you use.
4. In your Gradelink School News or Teacher Page post, click on the Image/File Upload button.

5. Paste the address for your hosted image in the URL field.

Making Adjustments
Once your images are in place, it’s easy to make changes to them.
To reposition an image, simply drag it to a new location.
To adjust the size of, alignment of, and space around the image, double-click on it to open the Image/File window.
Pro Tip: Text doesn’t look good butted up against images, so enter 10 to 20 for HSpace and VSpace.

Adding Videos
Videos require a different process than images and files, but it’s still easy to do.
1. Open the video on YouTube or Vimeo.

2. Click Share

3. Click Embed

4. Copy the embed code.
5. In your School News or Teacher Page, paste the code where you want the video to appear. You will only see the code or a red “IFRAME” icon; to see how the video will look once the post is published, click the Save button, then click the Preview button.
Sample Post
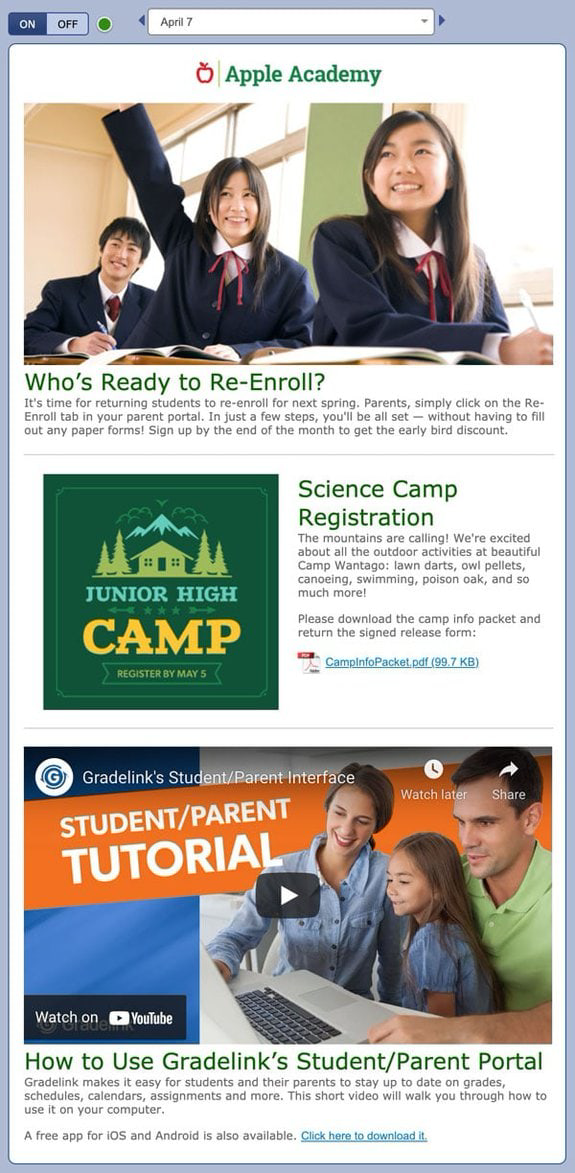
Take a look at this example to see how it all comes together – then create an engaging post of your own. If your school isn’t using Gradelink yet, click here to see more ways to help your school save time, improve enrollment, and fulfill its mission.

Advanced Tip
Use a Table to Contain Your Content
By default, text and other content will run the width of the window it’s in. To improve legibility — and appearance — put all your content in tables to contain it to a set width.

1. Click on the Table icon.

2. Enter the specifications you want. Start with one column and three or four rows, and set the width to 600 to 700. To keep your table invisible, enter 0 (zero) as the border size. Click OK.

3. Add text and images as you normally would.

4. To make changes to the table once it’s in place (e.g., width, number of columns, or rows), click on the Source button to edit the HTML code. If that seems a little too complicated, make a new table with the specs you want and copy and paste your content into it.
Tables take some practice and experimentation, but it’s worth the effort for better-looking and more legible posts. Websites like Tutorials Point offer details information on creating and editing tables.
